I had a friend look at it! He tried…

Probably one of the most infuriating things being a professional contractor with 35 plus years experience is those phone calls stating “ I had a friend look at it, he tried removing and cleaning (insert a multitude of things here) but it’s still not working.

We all have them in our lives those so called “know it alls and Mr Fix it”.
There’s a saying that has been floating around for a number of years now it’s “Stay in your lane”.

As a professional we Stay in our lane, no we won’t change a switch or plug or do any other electrical work beyond the scope of our trade regardless of our personal abilities.
For good reasons too, work done by a non licensed contractor could void your home insurance, cause legal issue for both homeowners and the person doing the work especially if there is loss of life. Minor but often over looked you could also void warranties when unauthorized repairs or modifications have been made.

It’s not good enough even if the person holds a “personal licence” as an example a gas fitter G1, G2 etc, while permitted to work on gas appliance they can not work on an appliance without being register with Technical Safety and Standards Authority TSSA.
TSSA is the governing body for fuels amongst other things, much the same as the Electrical Safety Authority ESA governs electrical.

To be registered with TSSA you have to be a business of one form or another not a personal entity. You will need not only to prove competence (bar is to low my person opinion) but also that you carry the appropriate insurance to protect the consumer.

So the next time you’re thinking about calling on that friend or friend of the family give it some thought as you could be risking more than you were aware.

Stay safe!

Gas Lines BBQ Time

What a wonderful day today, topping 19 degrees in Welland.
Not to early to BBQ, for this customer they are planning that this evening.
Nice jobs guys neat and tidy and at a budget leaving plenty of room to buy up those steaks.

Happy Grilling Gil.

Spring is coming

With spring right around the corner we can expect the down pour of rain so here is a your check list:

• Ensure all gutter down spout terminations are extended 6ft (or further) away from your home as practical. Be neighbourly however and don’t terminate them on to your neighbours property.


• Ensure guttering is clear of debris, downspouts and gutter can only convey so much water a Dan when blocked water will spill over adjacent to the foundation.
• Check your sump pumps and any backup system to ensure operation.
• Check the sump pump discharge line on the exterior that it is clear and also 6ft away from the foundation.


Flushing your money away!

We will keep this one a short flush today, its Friday and Sunny

A Chlorine puck(s) (Spa pucks) or bowl cleaners of any kind should not be put inside your toilet tank.

Why you ask?

A Chlorine puck(s) will, and some bowl cleaners cause premature seal failures. Rubber and plastic components do not do well when exposed to chlorine. Rubber will become swollen and plastics brittle. As we have seen in very recent service calls if you are lucky enough to be home it’s a minor disaster if not you are looking at thousands of dollars in repairs and probably an insurance claim.

Can you put them in the bowl, sure if you feel the need to splash the blue colour or put a cleaner dot on the porcelain then go for it.

Keep in mind we do not recommend any large use of chlorine cleaners with septic systems it can slow the rate your septic system decays waste.

Have a great weekend !

Heating the garage, she shed or kennel

Tube HeaterMaybe you have been thinking about heating your garage, she shed or dog kennel.  Unit heaters and tube heaters are a great affordable solution. 

For those who use the garage for its intended reason getting into a warm, snow free vehicle every day is a joy in our Canadian winters. The added benefit outside of the garage is the car will warm up faster and allow you to drive away frost free. Not having to stand outside in the cold scrapping and clearing snow and running the vehicle wasting gas are a real bonus.

So, which to choose from?  Every application has its challenges and with any gas appliance venting of the combustion gases are the most important. A site review is always needed to ensure either appliance can be vented correctly.  Both units can be sized pretty much equally for the space, both run about the same efficiency and both can be propane or natural gas.

A tube heater shown above, is relatively quiet and works on a radiant convection system, whereas the unit heat shown below works on force air convection and is a little noisier. Both have their benefits, if you are using the garage for things other than storage, let’s say a wood shop or painting then a tube heater would be preferable as it will not blow particles around. If the garage is used a storage and vehicles, then a unit heater can be more practical.Lennox Unit Heater

Tube heaters due to the fact they are radiant heat operate at a much higher temperature and reflect the heat by a series of reflective panels. This means that clearance from the tube is important, rubbers, painted surfaces and anything combustible must be kept a minimum of 4 ft away at all times.  This rule applies less to a unit heater due to it being forced air convection heat the temperature coming out of the unit is drastically cooler.

As you can see these are a few of the factors that will go into deciding which unit fit the application and why a site visit is the only way to full determine the wants and needs.

If you have questions, please do not hesitate to give us a call.

COVID-19 Support

These are trying and uncertain times, as a community we need to come together. There will be many in our communities that will need help with day to day expenses, but also emergencies.

We have no doubt that the last thing anyone needs when budgets are tight and the future is uncertain is a surprise with their home heating, cooling or plumbing.

From March 23 rd until our governments announce we are clear we will not be profiting from any service call. What this means is we will do the work at the minimal cost just to cover our day to day expenses. Also should any repair be at a cost that someone can not afford we will divide and/or delay payment(s) to an agreeable time frame.

Chris Wood President.

Air Purification-Inline filtration Systems

Air Purification-Inline filtration Systems

Indoor Air Quality product that make a difference at a reasonable budget

The single solution for everything in your air.

Healthy Climate®

PureAir™ Air Purification System

Cleans the air in the home better than any other single system

The PCO3-16-16 PureAir™ system attacks all three classes of contaminants, providing a healthier home environment:
Particles: small breathable particles such as pollen, dust and pet dander
Bioaerosols and microorganisms: viruses, dust mites, bacteria, mold spores and fungi
Odors and chemical vapors: pet odors, cooking smells, cleaning supplies and paints

Healthier

  • Exceeds hospital intensive care/operating room level filtration*
  • Attacks all three classes of contaminants, providing a healthier home environment
  • Particles: small breathable particles such as pollen, dust and pet dander
  • Bioaerosols and microorganisms: viruses, dust mites, bacteria, mold spores and fungi
  • Odors and chemical vapors: pet odors, cooking smells, cleaning supplies and paints
  • Eliminates dust, pollen, bacteria and viruses to help your customers breathe easier
  • Removes 99.9% of particles absorbed by the lungs, including infectious bacteria and smoke down to 0.3 micron**
  • Removes over 90% of bioaerosols including airborne viruses such as MERSA, flu and cold viruses down to 0.01 micron**
  • Removes 99.9% of all pollen, mold spores, dust mites and pet dander
  • No ozone emissions, a known lung irritant
  • Reduces and destroys ozone

Cleaner

  • Cleans the air in the home better than any other single system
  • Destroys household odors and chemical vapors

Home comfort

  • Industry-leading air purification technology – an air purification system unlike any other
  • Whole-home purification works with any brand of heating and cooling system

Reliable performance

  • Quality you can trust – designed with reliable, time-tested components
  • Uses the #1 rated MERV 16 Carbon Clean media filter
  • 5-year limited warranty on covered components***

PureAir_Competitor_Flier

PureAir_Brochure

*ASHRAE Application Handbook, 2007.

** One micron = 1/25,000 of an inch in diameter.

***Warranty applies to residential applications only. See actual warranty certificate for details.

High Efficiency Furnaces; Should you Two pipe vent or One pipe vent?

Since the mid 1980’s high efficiency furnaces have seen a popular growth in part due to government requirements to reduce energy cost and green house gases.

The early models of high efficiency furnaces required the furnace have both an exhaust and a single combustion air intake as a requirement of installation. Late models through the 90’s until present allow for the furnace to have either a single pipe exhaust or a two-pipe system described above.

The addition of a combustion air intake to a system doesn’t improve the efficiency of the furnace or degrade the efficiency when not use, however the home efficiency will be improved by two piping the system and we will explain below both the Pro’s and Con’s.

What is an Exhaust Vent?

Much like your car exhaust the exhaust vent on the furnace removes the harmful combustion (Carbon Monoxide) products from the furnace and exhausts them to the outside, where they are diluted by the open air.

What is a Combustion Air Vent?

Again, much like your car engine air intake, the furnace needs air to burn with the natural gas and propane to burn properly and efficiently. So, this pipe allows exterior air to travel into the furnace to be use for the combustion process.

Can we install a in-take vent?

All Vents (exhaust or in-take) require manufacturer or regulatory distances from windows, doors, intakes and exhaust to other appliance etc. This will impact the decision to use a two-pipe venting system or not firstly.  Most home furnaces will be able to “exhaust” vent pretty easily, but sometimes the “in-take” vent installation requirements can not be met, this is common on many town homes and row housing where there is only one or two exterior walls and many items are already exhausting to the exterior.

The nature of a “in-take” vent means it moves air from one location to furnace so this air can not be toxic or explosive, keeping it away from gas meters, car exhaust and other fossil burning appliance are just a few of the requirement your heating contractor will review to determine if two pipe venting is possible.

Finally, we get to the Pro’s and Con’s

So, you are good to go with a two pipe system, “but if its doesn’t impact furnace operation then why the added expense and another hole in the wall you ask?

Pro’s

  1. A more reliable system. Using free fresh air from outside ensures the furnace is getting good clean air to burn and will help ensure a good flame. It has been proven that flame sensing via flame rods stay cleaner when a two-pipe system is implemented. (Some homes with single pipe venting can see flame rod fouling more than once a season meaning more down time and annoying outages)
  2. A more efficient home. When using a two pipe system the air used to burn is free, on a single pipe system you are using air from the interior of the home and it must be replaced by air entering the home (air exchange) through cracks, windows and doors etc, this is cooler often low humidity untreated air that now needs to be warmed up. When two-pipes are implemented the air entering the home doesn’t need to be replaced by the air leaving the exhaust. Keeping the warmer air in and costing less.
  3. A Higher humidity levels. Less Air exchanges from a two-pipe system means less colder and low humidity air entering the building keeping humidity levels higher.

 Con’s

  1. Another hole in the wall. Yes, believe it or not many people hate seeing more thing sticking out of their home and when the vents are located in a visible area they can be unsightly.
  2. A Colder Basement. With the two-pipe system implement there are now fewer air exchanges happening within the basement area. This can often make a basement feel cooler the simple solution is to add addition seasonal return air, but that adds some cost. In our experience this is not an overly common concern, but it has arisen and should be discussed as part of the process.
  3. Stale Air. This is where the fewer air exchanges hits home again, because the home is seeing fewer air exchanges per hour compared to a single pipe system sometimes the air in the home can feel “stuffy” because of the lack of fresh air. A balance to this is installing a Heat Recovery Ventilator (HRV), again this doesn’t appear often but should be discussed on some new homes that already have high air sealing done.
  4. Blocked vent. As we are now using an air in-take this pipe can be prone to blockage from snow, pest or child play. Unlike a single vented system where these rarely become an issue, air in-takes should be installed at a minimum of 12” above the anticipated snow height for your area, here in Niagara 9-10” so the in-take should be a minimum 22” above grade, even at this height drifting snow can come into play. Most intakes have screens installed which prevents most pest entry, but the occasion hornet nest may be found. When the screen is either not installed, fallen out or installed down by the furnace then children can place small items into the vent, yes it happens we have pulled all kinds of things from vents.

Our conclusion, we feel the gold standard is to always install the two-pipe system when possible.

Understanding how a home cools and some simple tips.

“My second floor is so much warmer than my main floor, basement is so cold, air conditioner runs for long periods.

If you find yourself making these statements during the summer season your system is probably deficient in some way(s).

First let’s understand for many homes air conditioning is an add on installed sometime after to the existing HVAC system was initially designed.  The system most likely being designed for heating, even in many of today’s new homes little care is given to proper duct design, installation and change in season requirements.

Warm air rises (lighter) and cold air falls (heavier), understanding this simple effect you can move to the next step.

Your home upper ceilings will have the hottest air (upwards of 90+f in the summer) and your basement floor the coldest. For your cooling system to work effectively and efficiently you should be taking the warmest air and cooling that air through your air conditioning system not the coldest air and making is colder. This removes hot air allowing cool air to rise and will give you a more efficient system and comfortable home.

Return air opens (the one’s that suck in) are the key to solution for all the above statements. 

Let’s take an example:

Two-Story Home:

Second floor is 5-6 degrees warmer in the afternoon than the main floor and the basement is cold. The home was designed for heat with cold air returns located at the base of the walls on the main floor, one return air on the second floor also at the base of the wall and one located in the basement. The air conditioner is correctly sized for the home and fan speed is properly set.

Summer comes around and on goes the air conditioner, firstly air will take the path of least resistance on a poorly designed/installed system, the basement return air drawing more air in than the main floor and very little to non on the second floor.  The basement has much colder air than the main floor and the second floor. So the mixed air gets cooler running through the air conditioning system which is making it heavier and it will fall to the basement faster and get the basement much cooler and so on and so on.

The system will run until the main floor is satisfied as that is where the thermostat is located, the basement feels like the inside of a Coleman cooler and that sleeping area upstairs is sticky and hot.

The Fix is in!

So, what can be done, if you do have return air(s) on the second floor remove the grille and see if the stud cavity is open upwards to the ceiling (a cell phone camera is great for this). If the cavity is open, you can easily cut another return air opening about 6” from the ceiling and put a grille on it.


Now to ensure its working and/or get it working. Take a trip the closest bathroom and grab one square tissue of toilet paper. This high-tech tool is how you will test the return is working.

Place the tissue on the new return air grille opening and it should easily stick to it when you let go. If it doesn’t stick here’s what you should do.  Close any return airs in the basement 100%, on the main floor start to close off those return air(s) also; until the tissue firmly sticks to the grille on the second floor.  NOTE: You can purchase large fridge magnet sheets from Michael’s Craft stores that will attached to metal return grilles simply.

Important we do not want to shut all the lower returns off on the main floor if you only have one return on the second floor as the new return air will not be able to pull enough air through it to serve the air conditioner needs and the grille will also make a noise like a swarm of bees and you wont sleep.  

Last peace of house keeping, we recommend running a fan continuously during the summer on two story homes to provide balance. Air conditioners should not just run for five minutes a run time of 15-20 minutes is normal on a home that is already at the comfort settings. Short running air conditioning system will often give your a cool damp home and no one wants that. 

Now that you have a properly working return air(s) on the second floor sit back and finally enjoy the summer in your entire home. Just remember to reverse the system in the winter as we want to take cold air and make it warmer.

If all the above seems to be too much, call us we can take care of this for you.


April Showers! Sump Pumps and Back Up Pumps


Flooded Basement
Flooding basement

Spring is here and it appears that we are getting a lot of calls coming in for failed sump pumps and installation of back-up sump pumps.


A few reminders and tips on prevention, it’s always good policy to have a good water management program applied to your exterior.

  • Ensure gutters and downspouts are clean and clear of any debris.
  • Downspouts should terminate preferably 5 feet away from your foundation (3ft minimum)
  • If water barrels are used ensure the overflow is not terminating adjacent to the foundation and as per the downspouts terminate 5 feet away.
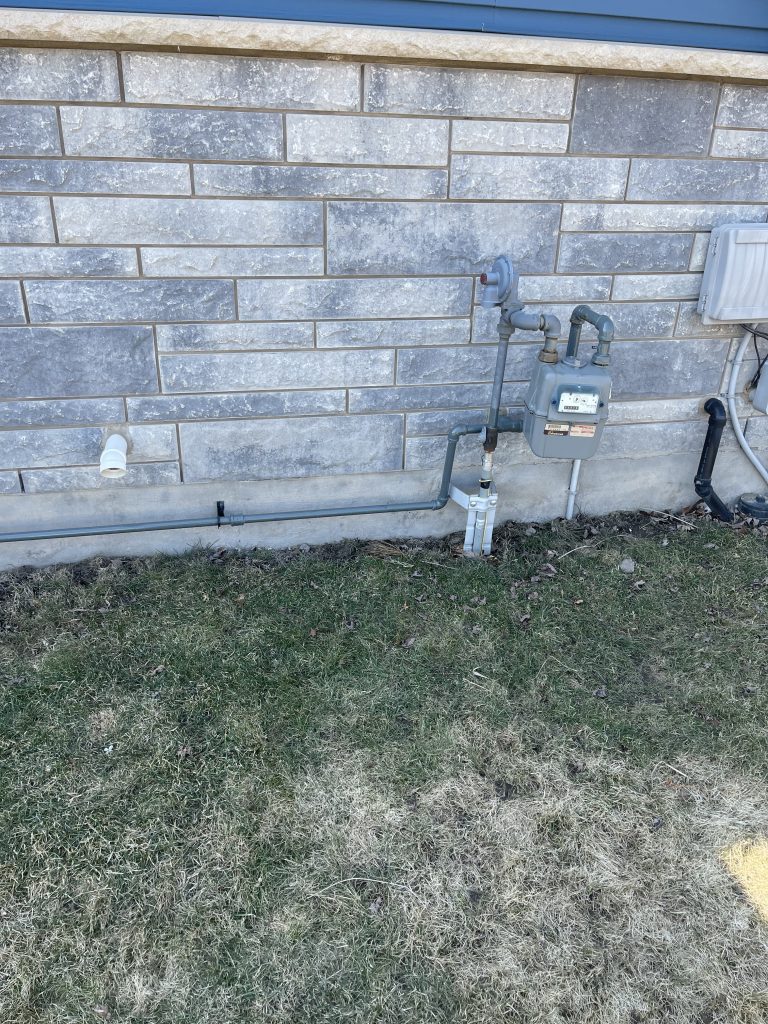
  • If your sump pump discharged to the exterior adjacent to the foundation wall it should be a minimum of 3 feet away, again we prefer it extended out to 5 feet.
  • Grade should fall away from the house foundation wall to assist water shedding from downspouts.
  • Consider using 10ft weeping tile extensions during early spring when most rain or heavy rain is forecasted.
  • Window wells should be cleaned out and can be covered with clear covers to help keep water away.
  • Side walks and driveways that are attached to the house foundation should be seal where they meet with a flexible sealant

Taking the time to address the above will go a long way in prevention and also reduce the amount of water your sump pump will need to handle.

Now to the interior and that hole in the floor, your sump pit and pump.

  • Ensure the pit is clean, debris in the pit will ultimately end up in your pump
  • Test that pump, most pumps are activated by a float that is either vertically attached to the pump or attached to a cord and floats on the surface. Lifting the float up to its maximum position should activate the pump
  • If you have a battery back up system, us the test button to check the pump operation and observe the battery light condition. If it needs to be replaced, lets get on it!

Is the sump pump correctly set?

Sump Pits
Sump pit Sump Pump

Probably half the pump systems we see are incorrectly set up, this maybe because of the DYI warriors trying to save a penny or two or inexperience plumbers.  The water that flows in through the weeping tile pipe into your sump pit is keeping your foundation dry. If the pump settings allows for water to sit in the weeping tile inlet pipe that means your foundation is being kept wet all the time. This can lead to structural issues, foundations sinking and often step cracking in exterior brick work. A properly set sump pump will start to pump just as the water meets the weeping tile or below, keeping your foundation on a solid footing.

What size pump do I need?

Not all pumps are the same, the pump should be capable of removing the water that flows into your pit easily and also fit within the pit diameter. Vertical column pumps have been used for many decades and provide good pumping for tight pits but are some of the noisiest pumps out there, submersible pumps with vertical floats offer quieter operation and work well in tight pits. Submersible pumps with horizontal floats should only be install in pits with the correct diameters.

1/3 HP or 1/2 HP are the most common residentially, bigger is better but often not required. 11/4 discharge or 11/2 discharge. Again, bigger is better but it should at the very least match the size of the outlet of the pump.

More to come on back-up sump pumps, stay dry and stay tuned!